Marble Machine Progress: The Slowest Mirror Ever
We’ve been working on an interesting project for a couple months (it feels like forever) so I thought I’d write up an update.
Some of my friends and I have a small “company” Perciplex that we’ve used to do some consulting work ion the past but now mostly just use as an umbrella for projects.
After we spent like a year on and off working on RaaS (Reality as a Service, it was a webpage you could submit OpenAI gym jobs to and run them on real hardware) we’ve decided to go on to intentionally small scale projects.
The first was new friend https://www.philipzucker.com/markov-slackbot/.
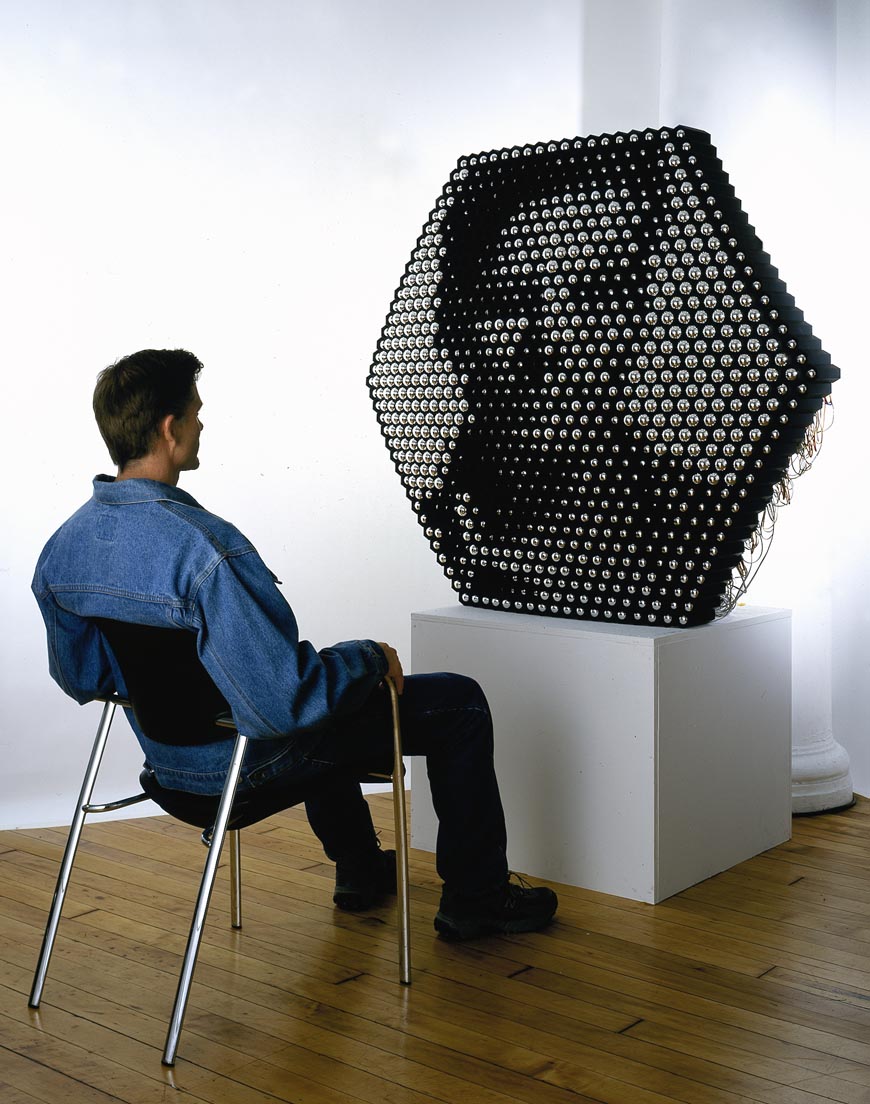
The next was marble mirror. The idea is to draw out an image using colored marbles somehow.
It was inspired by Daniel Rozin’s mechanical mirrors http://www.smoothware.com/danny/ Very cool.
We were insane to think we could do it in a month (meeting once a week). Like that is actually laughable.
But we’ve hit a milestone!
A momentous occasion! pic.twitter.com/fWjtwTHqRN
— Philip Zucker (@SandMouth) October 28, 2021
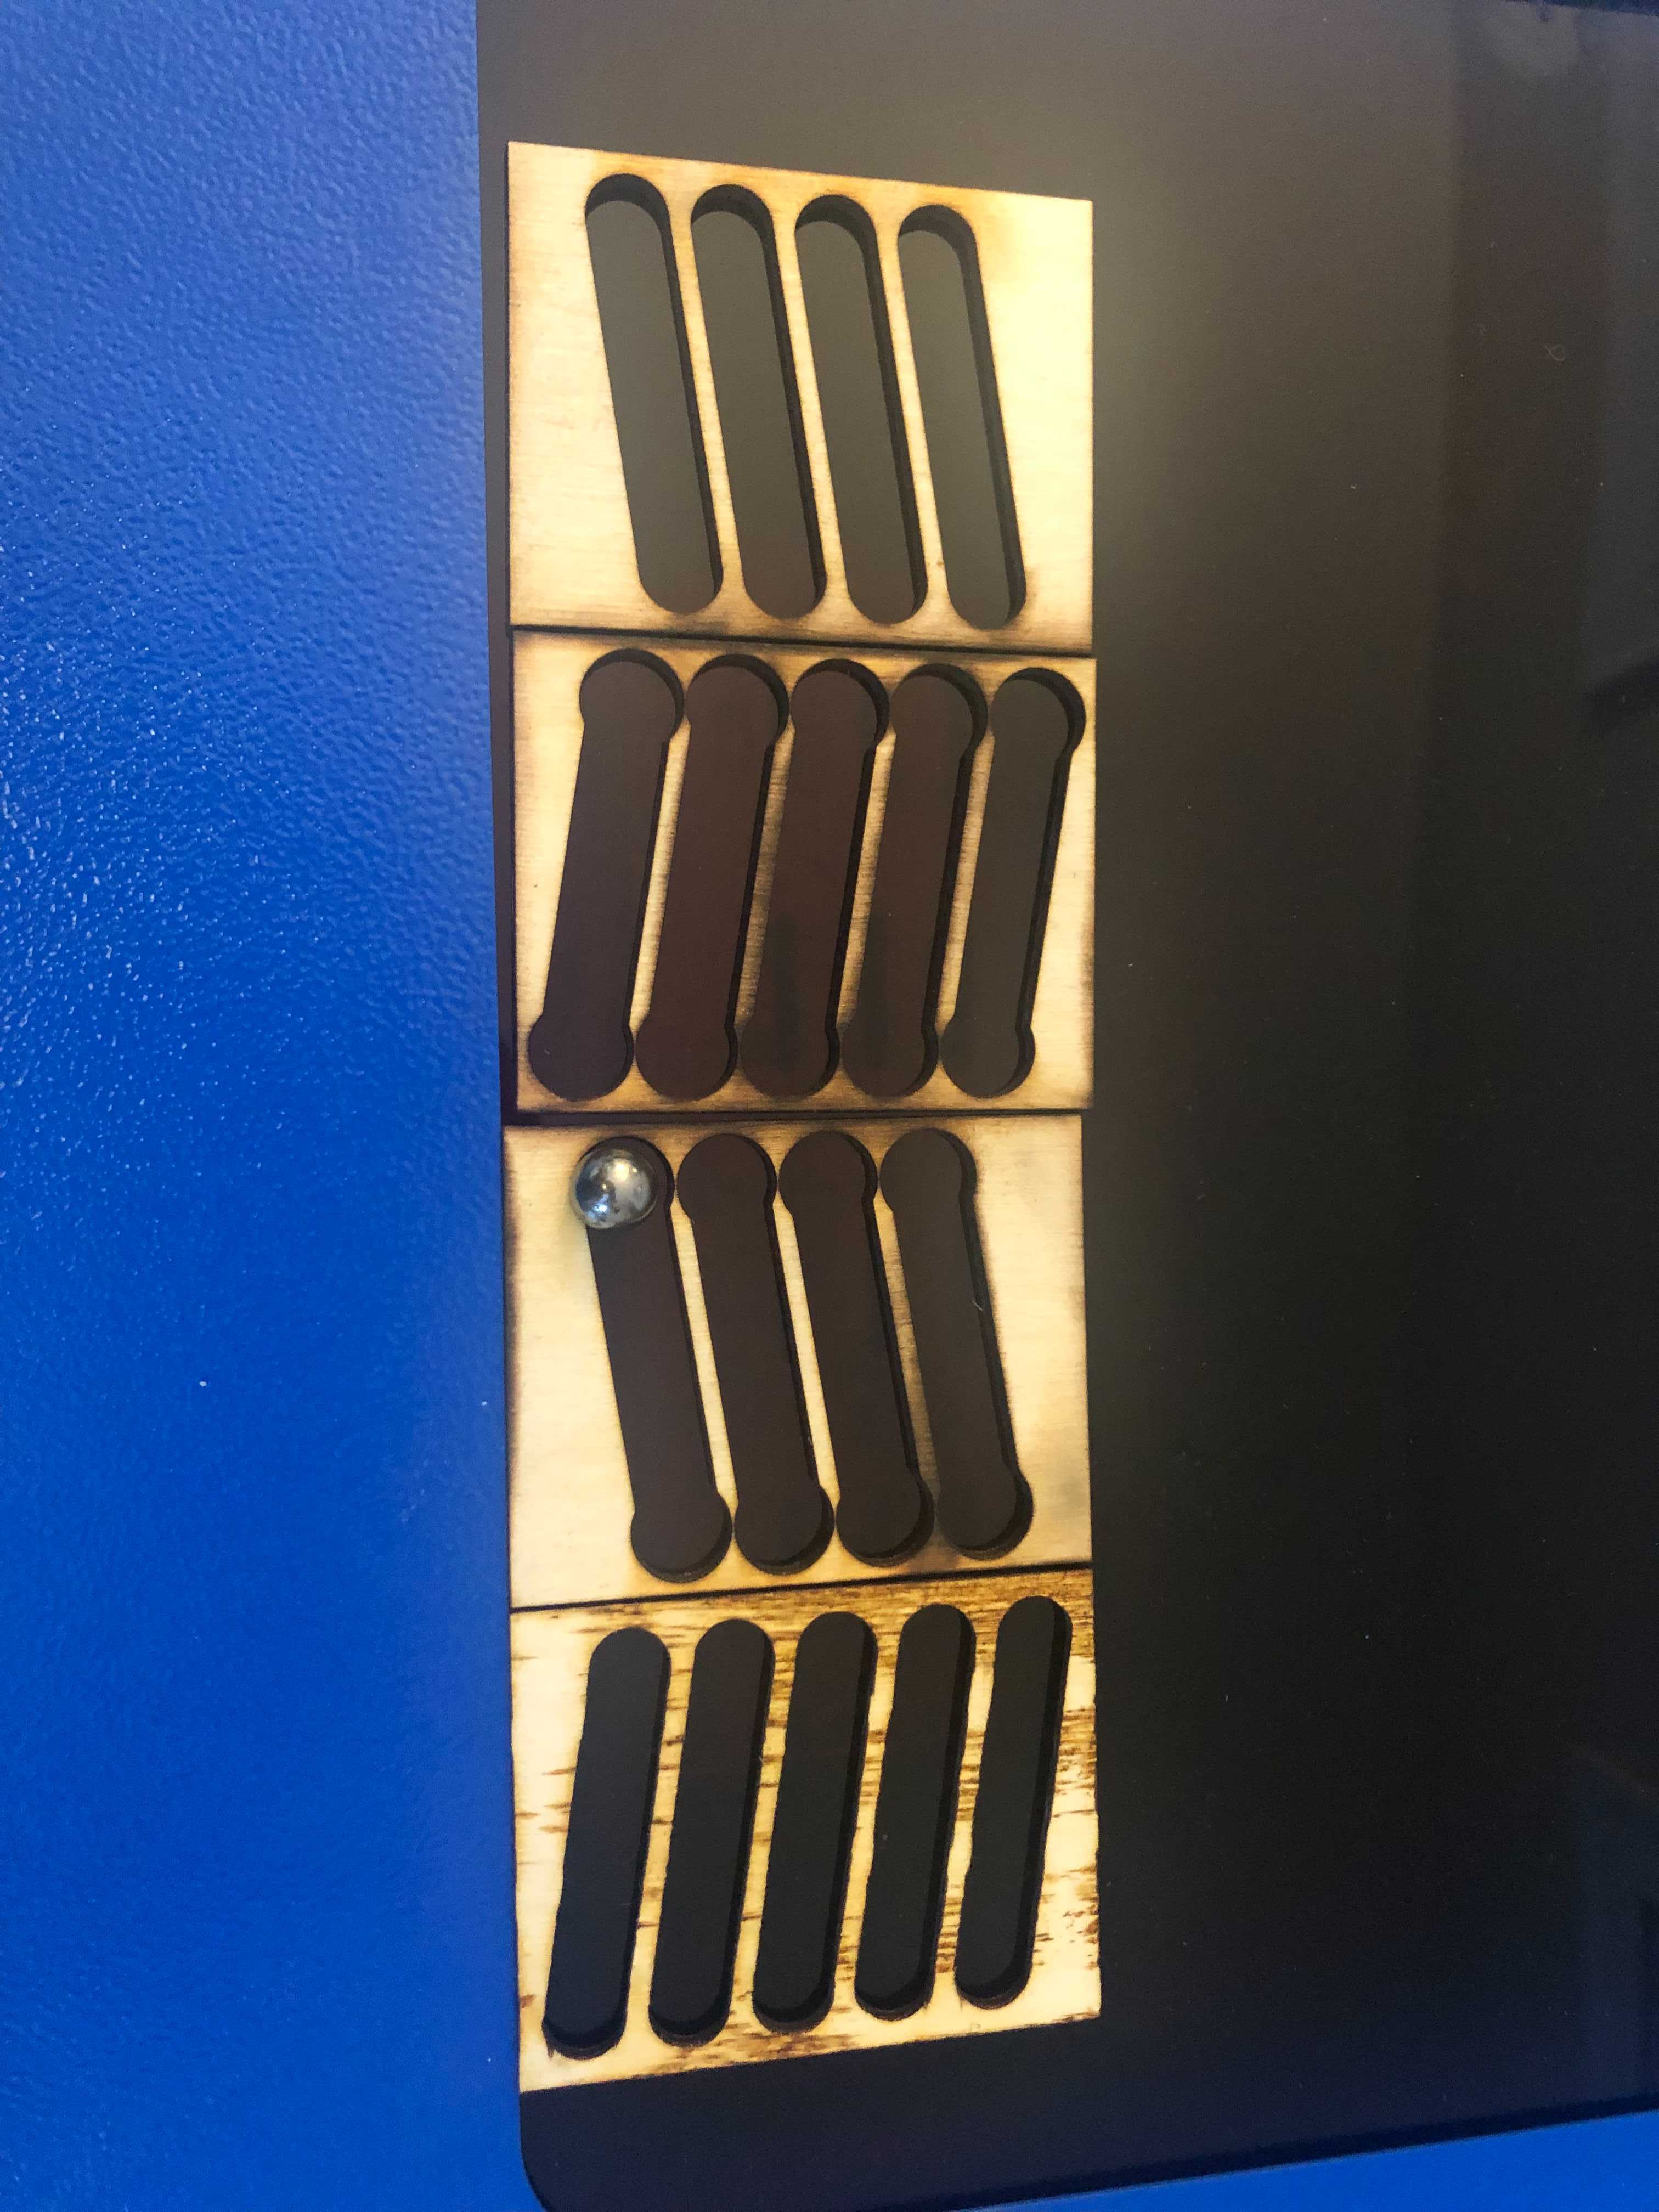
It’s a laser cut marble mirror. There is a servo powered “connect 4” mechanism at the bottom of the marbles. A “pacman” drives the bnalls up a column. On the back are 2 steppers and a servo. The stepper controls a carriage which has an RGB sensor and a servo. It draws some image of choice (4x4 at the moment) in silver and blackened steel bearings. We have python code that rejects balls until it gets one it can use. The github code is here https://github.com/perciplex/marble-mirror.
This was long time comin’.
Now how the heck do we scale?
Ben’s blog post on the project http://blog.benwiener.com/electronics/projects/programming/2021/10/28/marble-mirror.html
Timeline
- late May 2021 - Start
- June - 3d printed prototypes. Lots of churn on ideas and discussion going nowhere.
- July - purchase laser cutter. Fiddle with it a lot. Helix design
- August - Move to Declonian method. More stock 3d printer-esque technology. Carriage with turnscrew + steppers. Pitbull fever overtakes Perciplex. It’s ironic?

- Sept - super busy month. Ben’s wedding is close. I am moving. Didn’t work much
- Oct - A parade of triumphs!
Notes
We started by seeing what was out there in terms of marble control.
- https://www.youtube.com/watch?v=iamgXkVpgpI
- https://www.thingiverse.com/search?q=marble&type=things&sort=relevant
- https://www.lumberjocks.com/projects/45472 This is a very clever marble lifting mechanism. We basically copied it. It’s great. We affectionately refer to this as the pacman. Notice that an essential point is that there is a bar to guide the ball out of the pacman. I belive the pacman disk should only reach halfway up the ball for this reason. The disk should also not be tight in the disk slot.
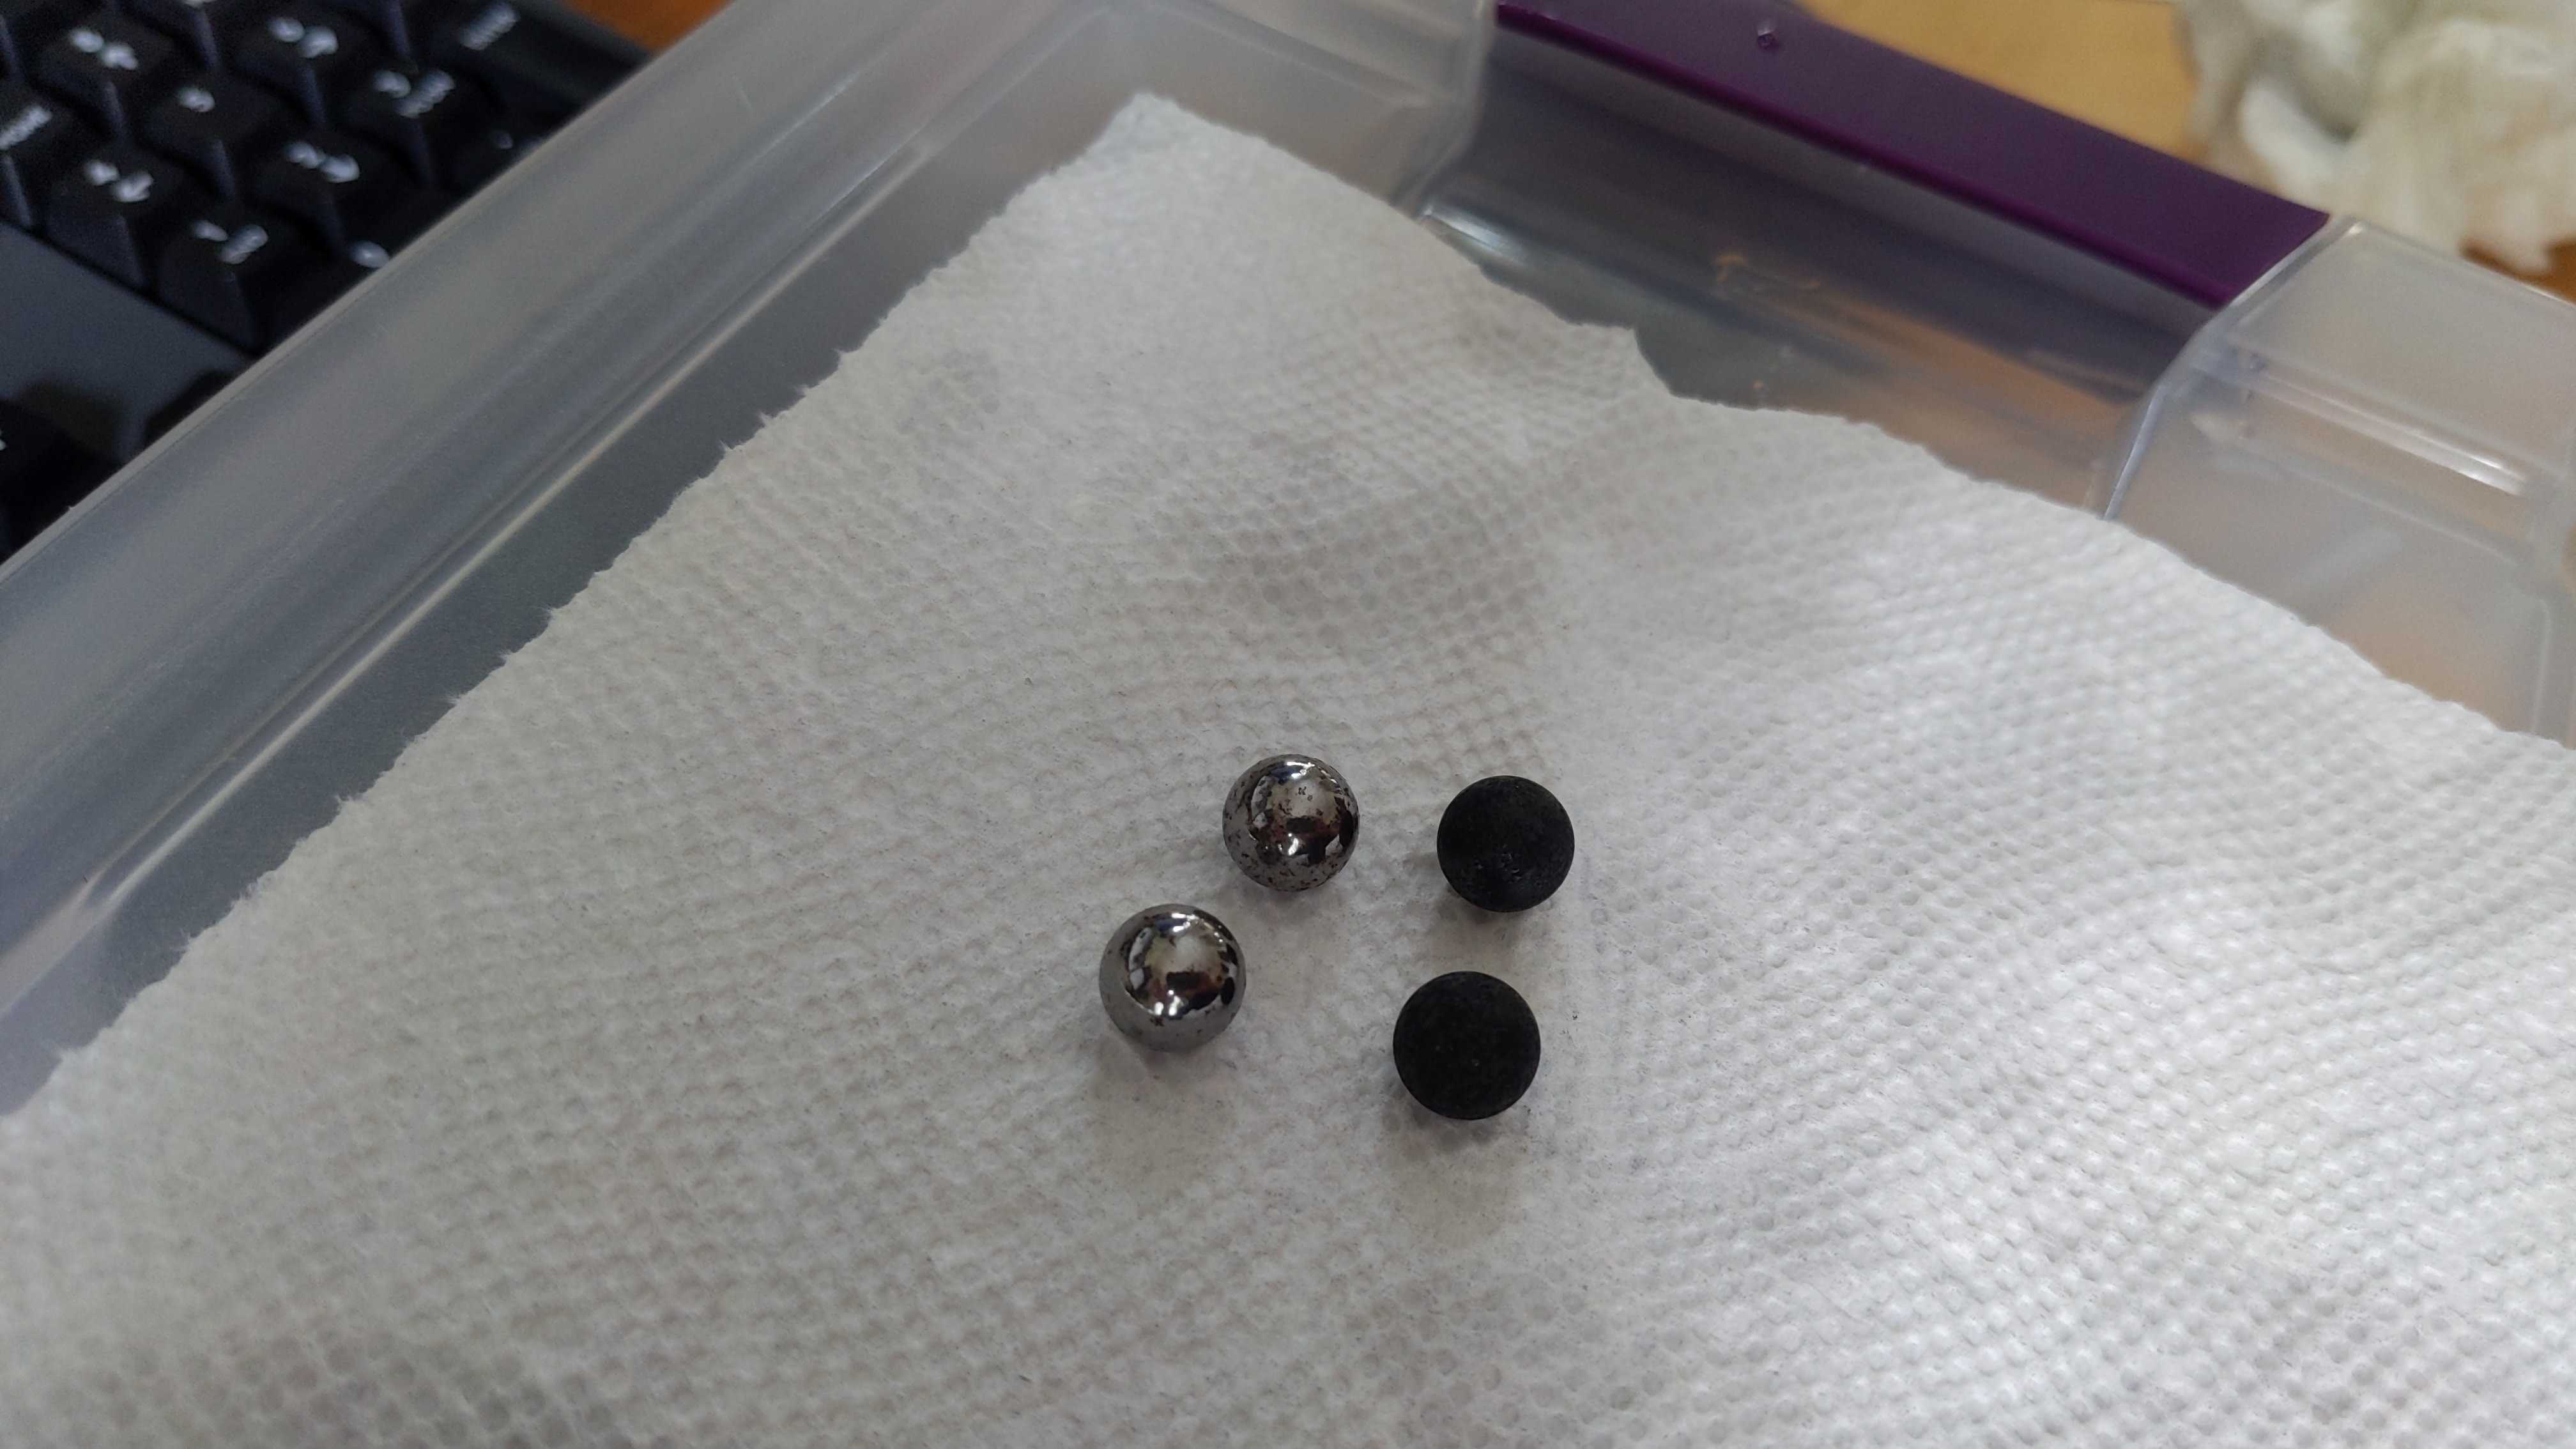
One could choose to use marbles or steel bearings. You can be sacks of such off of Amazon. Slingshot ammo seems like an interesting possibility, but it isn’t very well dimensioned. Our current approach is to use steel bluing liquid (Super Blue) on chrome bearings. With that we can get black matte balls and silver balls. Hot tip: do multiple coats, clean with denatured alcohol first. We were a bit confused at first why the coating seemed so bad.
A big question was how “multiplexed” our control of marbles was going to be. How many active degrees of freedom (DC motors and servos) to use, sensors. It seems to be a common tradeoff that the more passive you go, the more accuracy you need in your manufacturing and fiddling you do.
Large Scale Design Choice for the Screen
Intestines
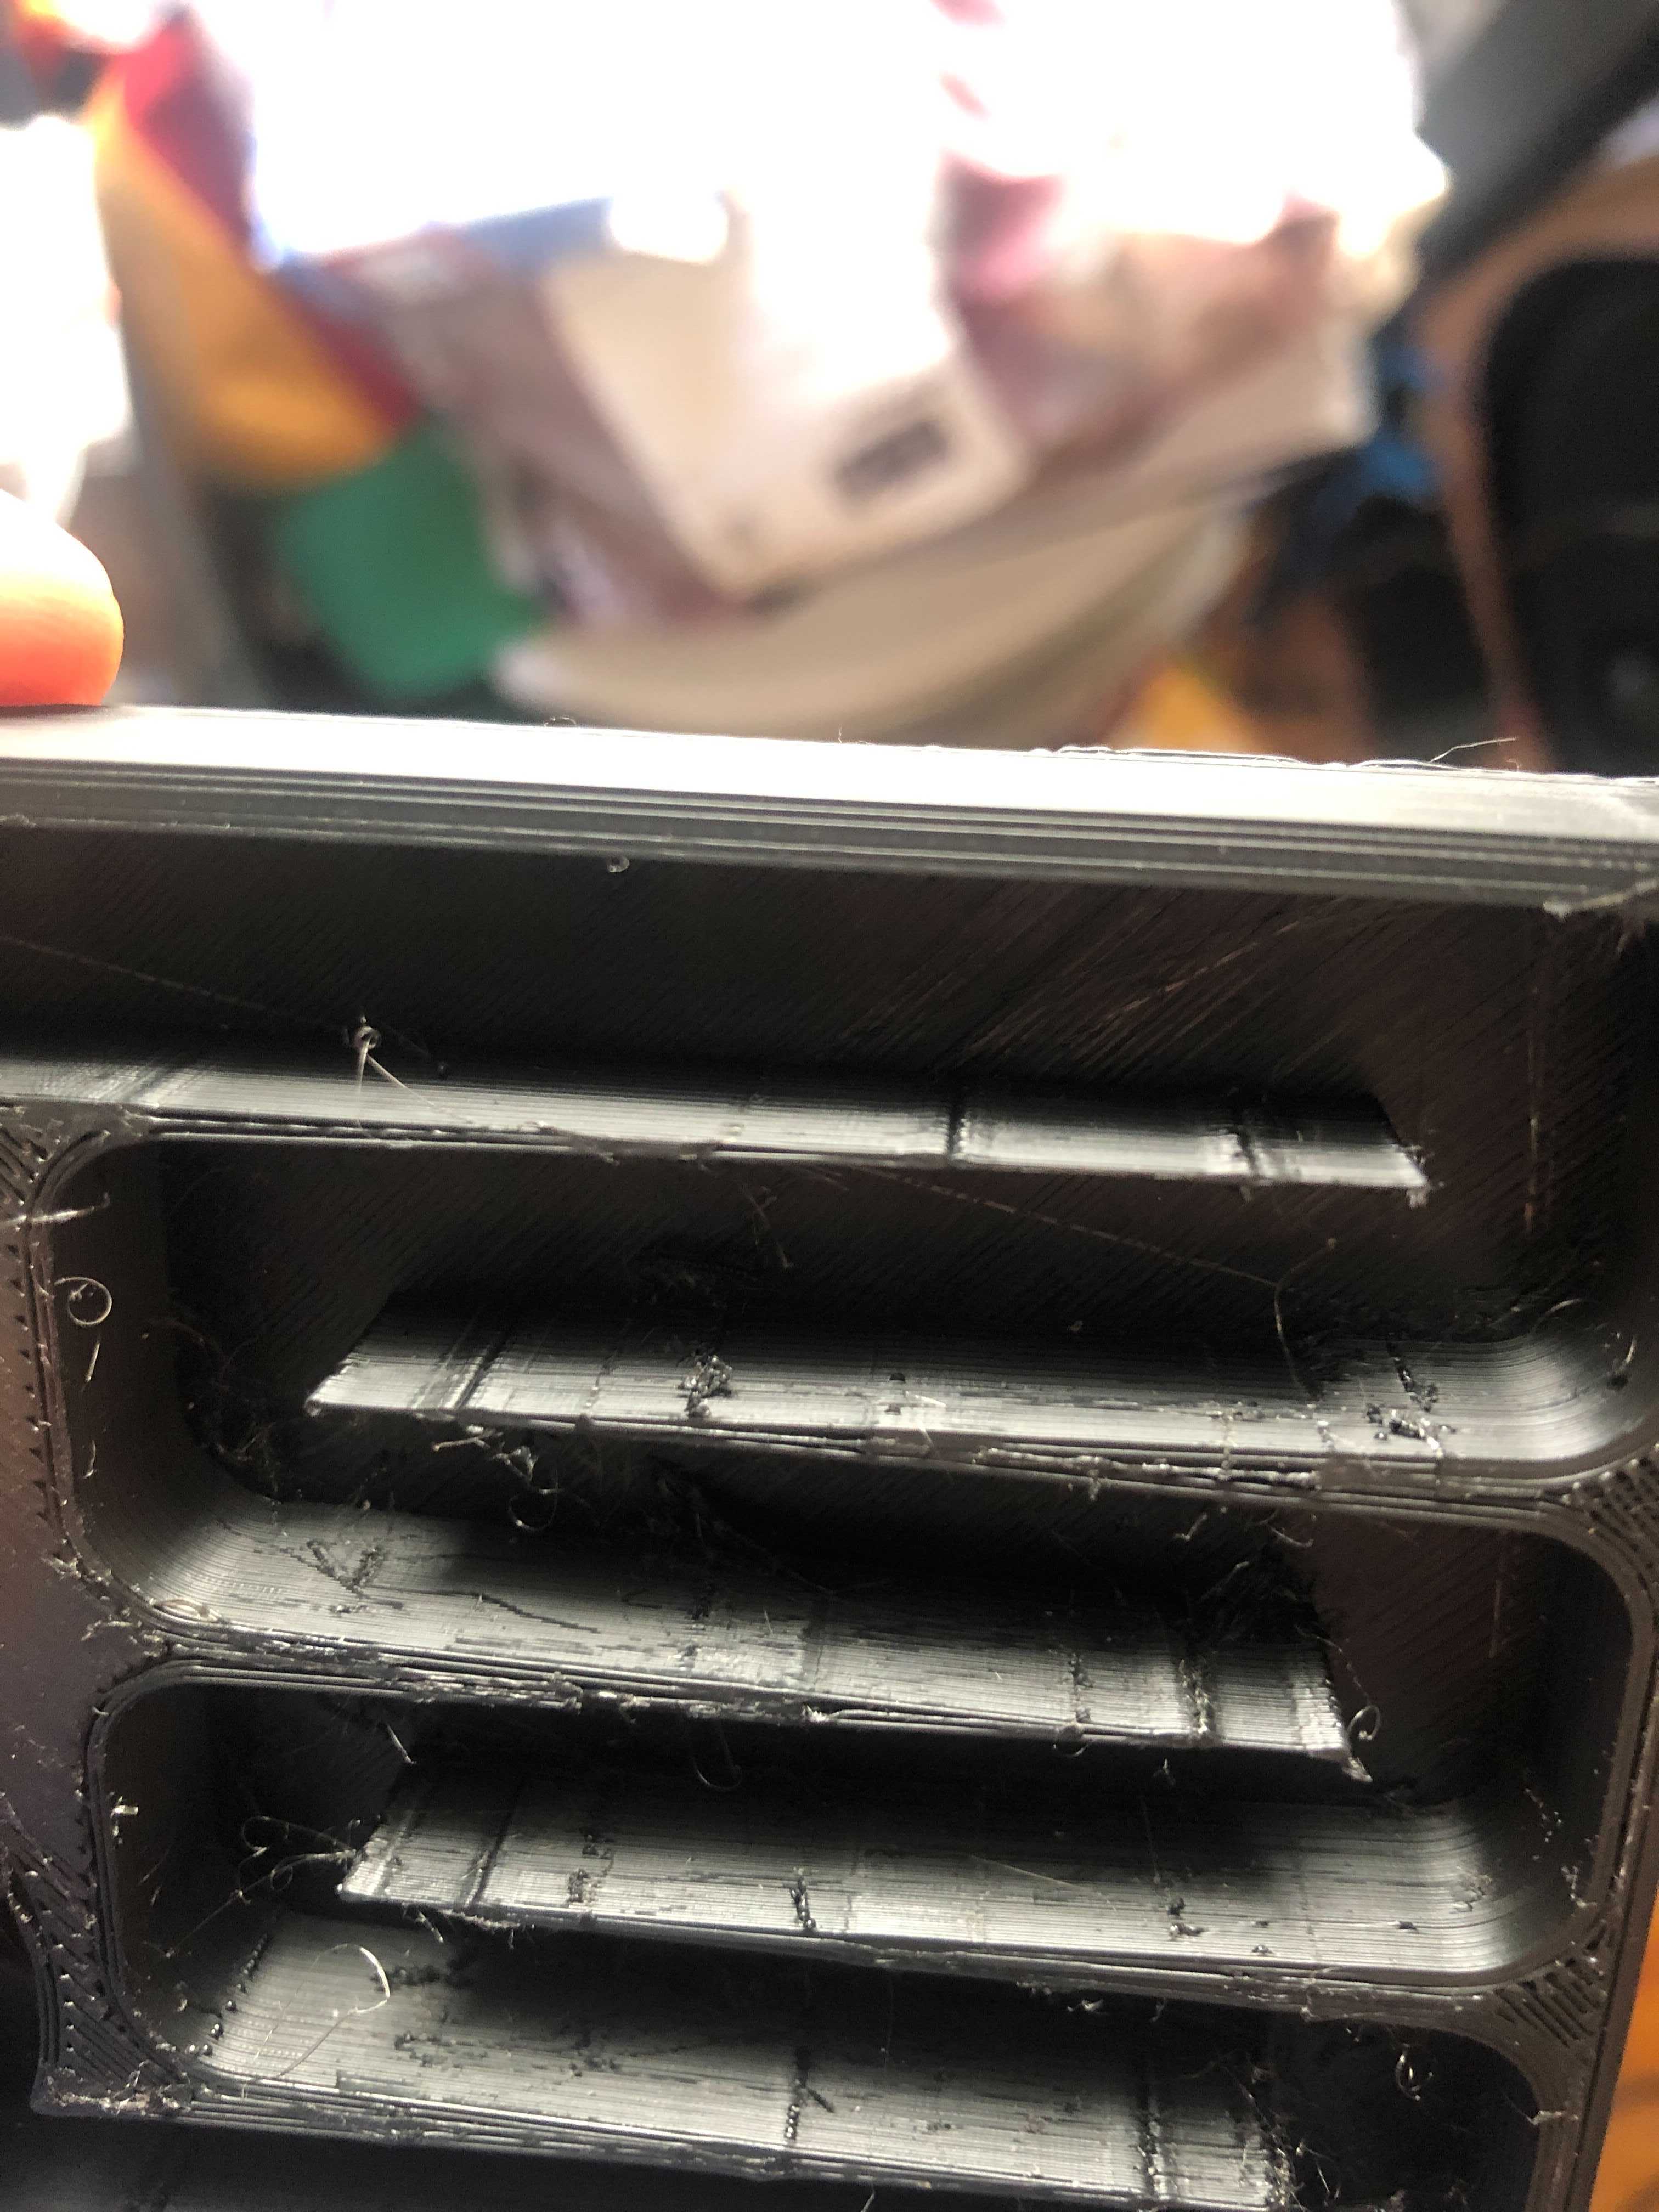
Some initial designs were tested on the 3d printer. It exposed issues with the process. A fundamental problem with the “intestines” design is that you need shallow slopes or else there are massive gaps between each row. This is bad for looks and picture quality. The 3d printer generated discrete ridges at these low slopes. Maybe these were artifacts of the choice of printer head movement? Unclear.
Horizontal Rows
Some compelling early protoypes.
Helix
I really liked this design. The idea was that we could use stacked 3d printed rails to form a helix. If the front pieces are made of clear acrylic, in principle no gaps between balls are necessary. An issue arises in the out of place motion. The balls did not reliably move in that direction and could get jammed. Ultimately it was decided we were trying to be too clever. I still think there is something here. Design documents: https://cad.onshape.com/documents/1eb68be4a7e8953bd6217f48/w/0c9623fca1e0c7a8c462ad3f/e/bd188b089a7da907ba743ef4?renderMode=0&uiState=617b10b722244b5fd8c82a9d
Spiral
An insane version. What if the track is a giant spiral? Then rotating the whole tracking drives marbles inward. Never really fleshed out
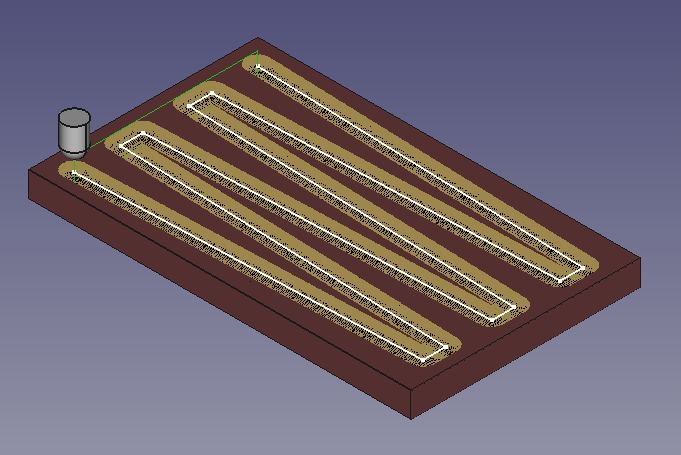
Vertical Rows + Connect 4 release.
This is currently what we are going with. It’s very natural
We bought a basic 40W laser cutter July 2 as a leap of faith. It felt like we were being severely limited by our ability to rapidly prototype. In principle we could send off to get cuts every week, but it wasn’t working and the money would always be a forcing function to not do so. It showed up and worked! I’m ultimately very happy with it. We followed instructions on the internet to try and add air assist. This was a boondoggle that wasted weeks on poor laser cutter behavior. We put back on the stock parts and it seems to work just fine for our needs. We also added an ammeter to the front. The hour Ben and I were drilling through steel and bending and cutting away tiny scraps of sharps chinese steel were truly truly awful. Ultimately, we were already running the laser at about the recommended 18mA at the readout of 55%. Oh well.
We can cut 1/8 plywood at 8mm/s at 55% power. Sometimes it doesn’t quite make it through and needs some help with the x-acto knife.
We use K40 Whisperer as our control software. You can make an SVG or DXF vector drawing and import it. K40 whisperer color codes the lines to decide to either to egraveing cuts or cutting cuts. We use onshape’s blueprint drawing basically to export dxf after removing the extra crud it draws by default.
Laser cutter construction techniques:
- “Dino Bones” - Onshape and the auto layout featurescript and laser joint featurescipt https://forum.onshape.com/discussion/14166/designing-laser-cut-finger-joints-by-hand-is-tedious-heres-how-to-automate-it-tutorial Very useful. Ben loves them
- Stacking / “lab on a chip” style
We originally had a homemade CNC router machine and 3d printers at our disposal. This ended up being a big problem. The CNC machine was just unreliable, slow, horrible to be near, and hard to use. 3D printers are very flexible but very slow and not very dimensionally accurate at all without fine tuning.
For marble detection in the carriage we are using an adafruit RGB sensor It is a little finicky and not entirely clear we should continue using it. We colored the inside of the carriage blue with painters tape. For the moment, taking some samples of empty, black ball, and silver ball and then using Nearest neighbor classifier from scikit-learn seems to be working ok.
A clever trick was to use two backboards so that we can have the screws not interfere with balls and rails.
We got a cheap raspberry pi motor driver board. It acted weird. Not worth it. Bought an actual adafruit.
Getting actual standoffs was nice. Also knurled knob screws for easy disassembly